Heeeeeellooooooo, and I hope you had a marvelous weekend! I am so excited about this post for a couple reasons:
1) It’s a cute project that makes my little girl’s room even cuter 🙂
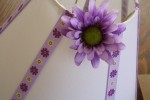
2) the main reason, though, is this – remember those 4 pics I shared with you in one of my very first posts? The pics I was trying to use to whet your appetite and pique your curiosity?? Well, today I am using this pic:
and it is the last of the 4 pics I shared with you!! That’s a milestone. I shall celebrate by eating a large cake. 🙂
This is a simple and easy project. So fun to do – and easy to do it on the cheap! I found this lampshade at a yard sale. They were asking $1, so I grabbed it because I had recently bought a lamp at goodwill that didn’t have a shade. For a while, this boring old silver lamp with a white shade sat on my little girl’s dresser. It was fine and it performed its job very well. Not very beautifully, but very well indeed. But then one fateful day…
I was looking through my random craft items and came across a few that gave me some inspiration that could change this lampshade’s life forever. Here’s how you do it:
Gather your supplies:
Decide how you want the ribbon placed on your lampshade. You could do it straight up and down:
Or on an angle:
I decided to do mine up and down because my daughter’s room is kind of a traditional flower-y, not a funky flower-y. I think the diagonal look could be super cute, though – especially if you used multi-colored ribbon and it was placed in a bright, fun room. Seriously, the possibilities are endlesssssss with a lampshade like this, so have fun and experiment with it!
Take your ribbon and glue the edge on the inside of the lampshade:
I waited to cut my ribbon until after I hot glued one end down. Continue gluing ribbon all around the shade:
I had some purple and yellow flowers – I was thinking of using them to go all the way around the top of the shade. But after playing with it a little, I decided I liked the look of just 1 purple flower on the top. I cut the stem very short, then hot glued it on the edge of the shade.
And there you have it! A simple transformation using a few materials!
Total Cost of this Project: $1 (plus materials I already had on hand)
Here’s a picture of the completed project in my daughter’s room. I love it!!!! (Notice the book on top of her dresser? That’s where it sits – honestly! – I didn’t move it there just for this pic. ;))
What do you think? Ever tried a lampshade makeover before? Does this inspire you to try one? I hope so! It was easy and had great results! Let me know if you try it. I would love to see your pics. 🙂
~Christa
I’m linking up to:
Skip to My Lou
Making the World Cuter
C.R.A.F.T.


