If you follow me on twitter or facebook, you know that I was up to *HERE* with cupcakes 2 weeks ago. (by the way, does anyone really know where “here” is?)
Anyway, I promised I would share pics. And so here is the promised post. First of all, my friend, Chrissy, and I were looking for some way to decorate the cupcakes. I have this little cupcake book I got as a wedding present. I’ve never used any recipes from it, but the picstures of the cupcakes are super cool! We started looking through the book for inspiration and noticed a winner. Cupcakes with chocolate heart “outlines” on top. So cute!!! That was our jumping off point.
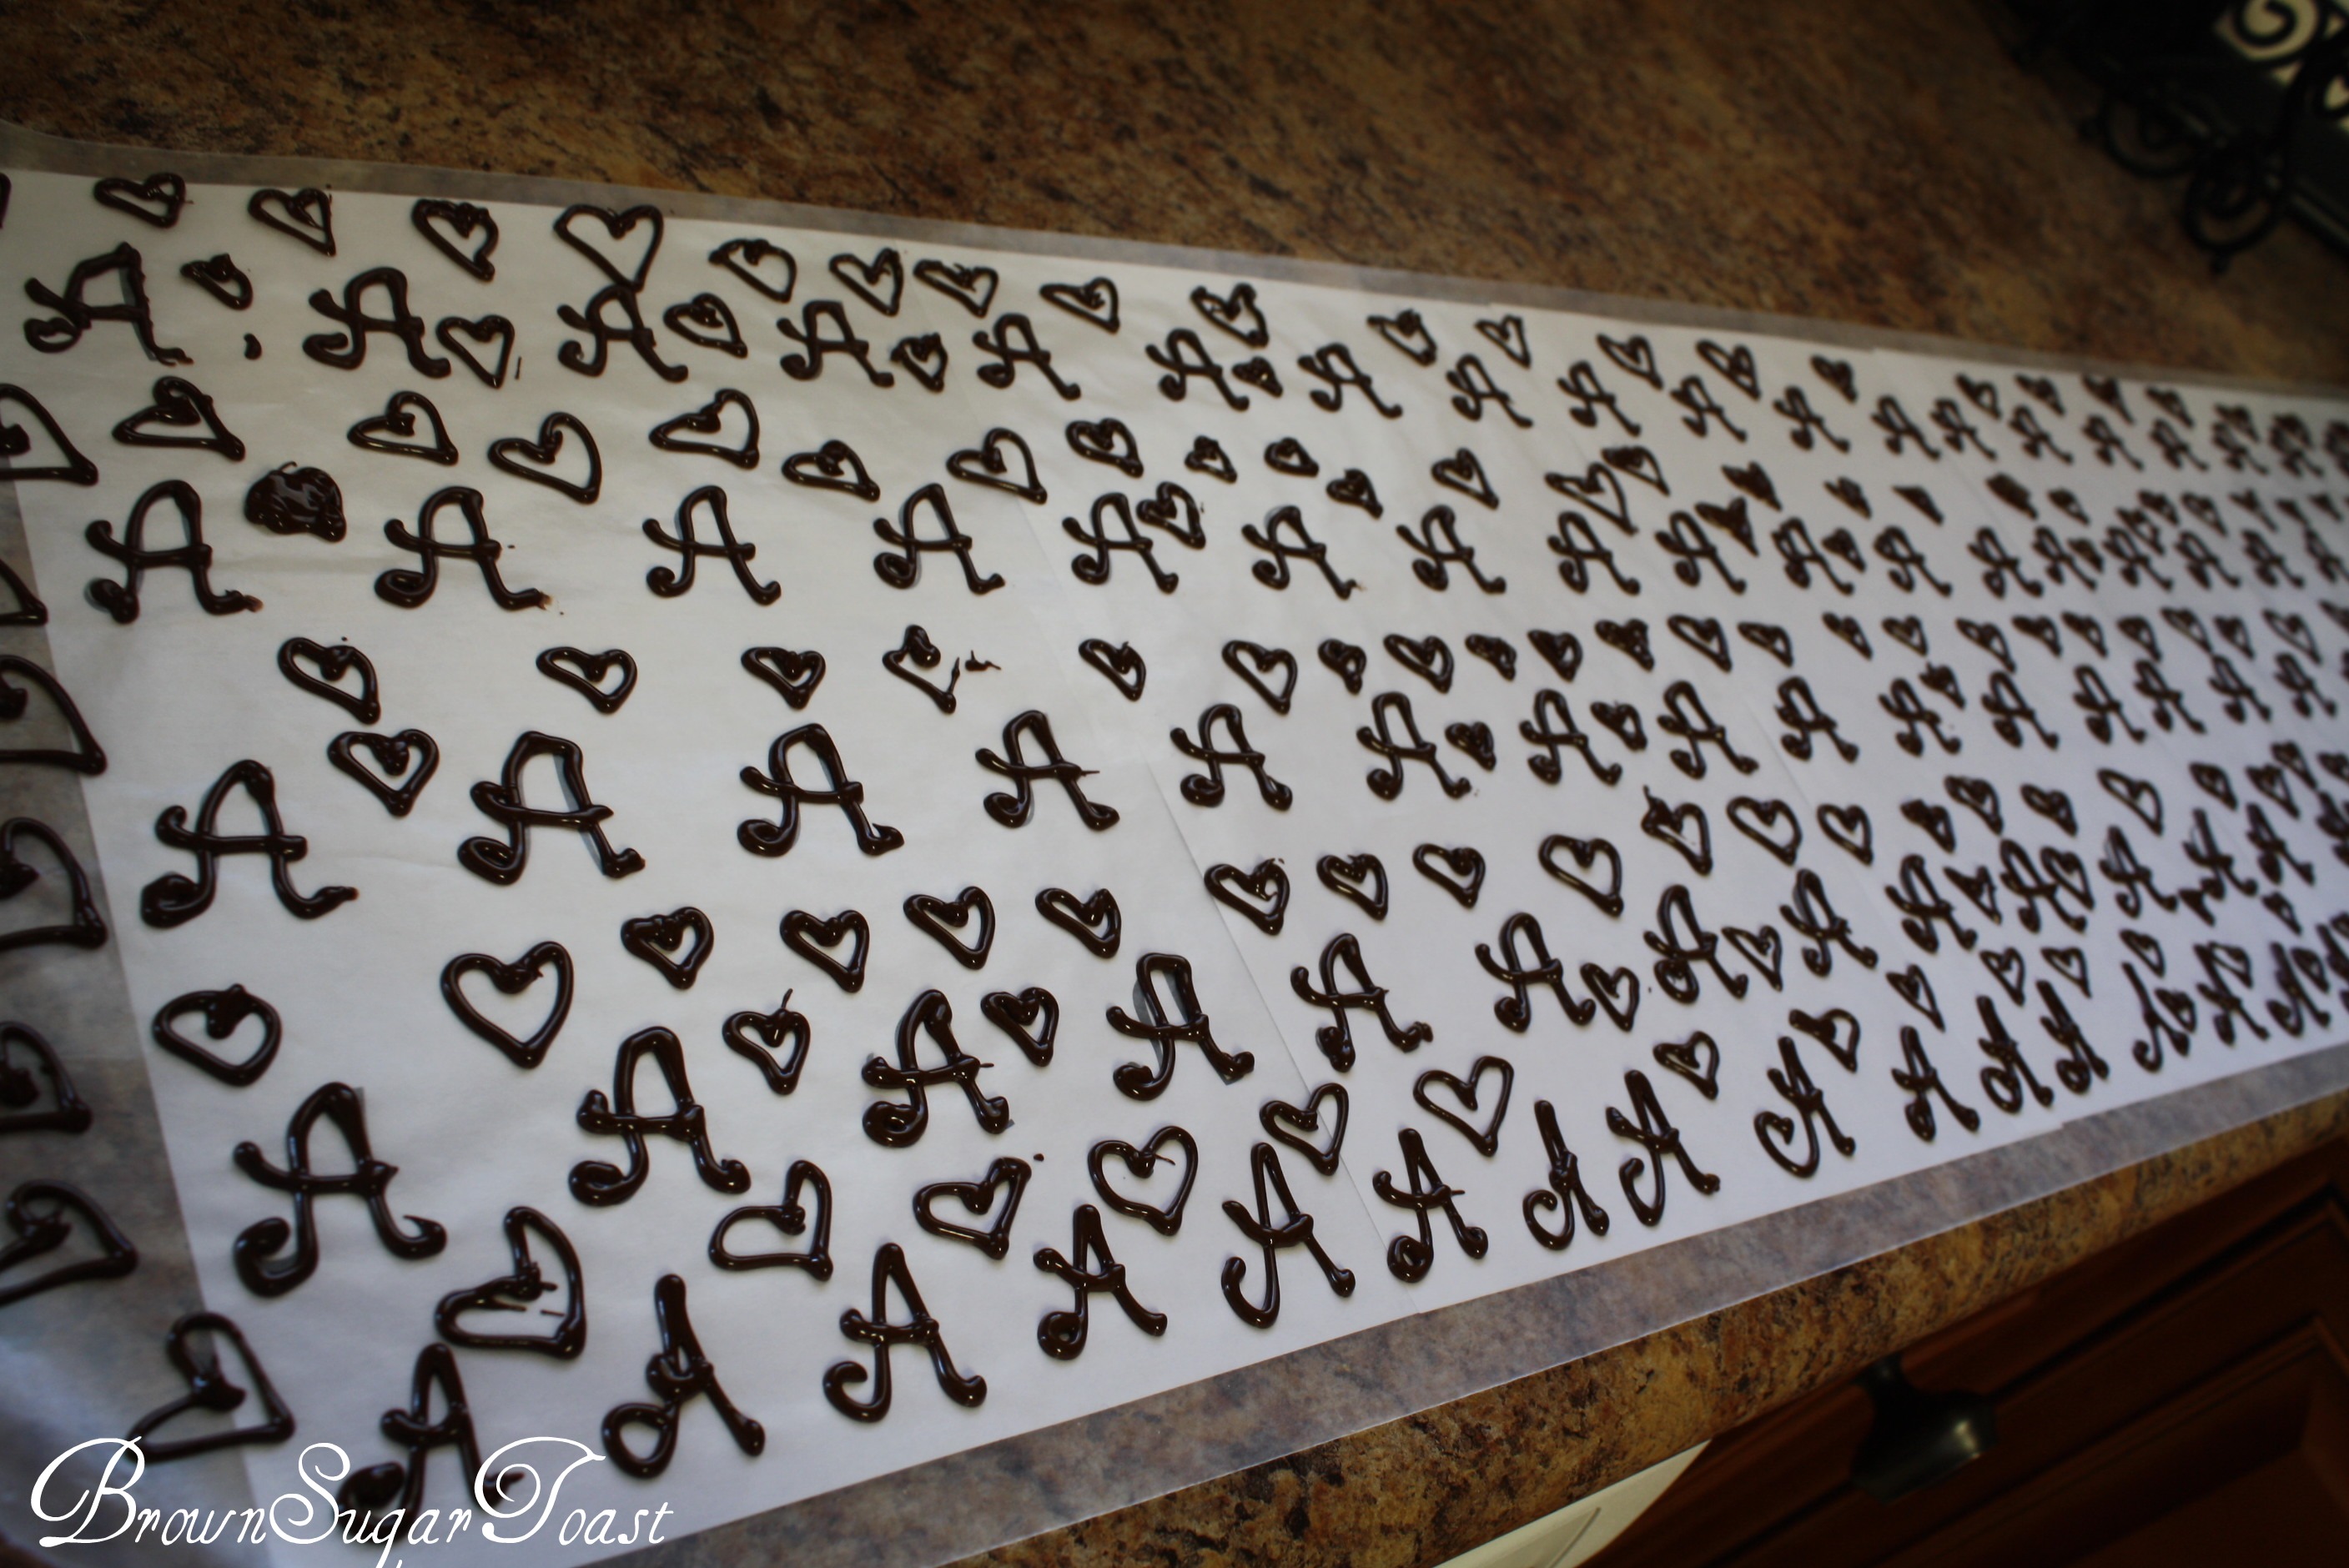
The new baby’s name has not yet been revealed, so we decided to go with the first initial of their last name: “A.”
This is how I did it: first, find a font you like. Print out several sheets (depending on how many letters you need) of evenly spaced (enough space to do your chocolate work) pages. Lay your pages out on a flat surface,

cover with waxed paper,

and tape. I taped it just for good measure…didn’t want to bump it and have my chocolate slide all over the place. 😛

Next, make your chocolate.
I spent a while looking on the internet for a recipe for melting chocolate. Finally, I pled for help in my facebook status and a friend came to my rescue.
Now, if you read ANYthing about melting chocolate, you know that you’re not supposed to use chocolate chips for melting. Chocolate chips are made to hold their shape, and supposedly don’t melt well. blah blah blah…I didn’t have any other semi-sweet chocolate. I’m here to tell ya, I used chocolate chips and it worked. Shoot me. 😉 Yeah, it’s pretty simple.
Take chocolate chips, put 1 cup in a microwavable bowl, add 2 Tblsp shortening, and melt. I started with 1 minute, took it out and stirred, then gradually melted the rest in 20 second increments. Why? Because you don’t want the chocolate to burn. If it does, it’s unusable. Unless you don’t mind black, charred, “cajun-flavored” chocolate. I happen to like my chocolate dark brown, not black. 😛
See how nice it looks? 🙂

Now, snip a tiny corner off a plastic bag. Make sure it’s a very tiny corner – especially if you’re doing something like a monogram. Spoon the chocolate in the bag, making sure the top is either tightly closed or “squeezed.” 🙂 Pipe the chocolate out in the shape of your letters.

Now, I had a lot of chocolate left over, so I began piping chocolate on the wax paper that didn’t have any letters under it. (For the record, my hubby and I actually liked the letters I did without the font underneath better than the ones I “traced.” score!) I had so much left over, I started making lots of little hearts to put on the cupcakes along with the monogram.

Let dry until hard and firm to the touch. If you have lots of fridge space, peel the letters off (super easy to take off!)

and put them in a single layer on a cookie sheet. If you don’t, carefully place them in a container and refrigerate. I used both methods and they both worked. I found they “stuck” a little more to the cookie sheet and were more difficult to pull off when I was ready to use them. Not sure why…maybe it was just my experience. 😛
For the minor detail of the cupcakes…I used cake mixes. Love ’em. Don’t hate on cake mixes. They saved me caboodles of time. And I’m sure nobody would have known the difference if I had made them from scratch. Well, my hubby would have because he would have had to do stress-therapy with me afterwards. 😉 I used 3 chocolate cake mixes and 1 vanilla. Chocolate was definitely the favorite at the shower.

On to the frosting. I used this recipe and made some light purple buttercream frosting.

I also made some peanut butter buttercream frosting on a whim. That was probably the best whim I’ve ever had. Everyone loved them. I think it was the element of surprise because they weren’t expecting the chocolate/peanut butter combo. (Don’t try that on someone with peanut allergies. They will get quite the surprise. :P)
As far as how I piped the frosting…don’t ask. It was a horrid experience. Thankfully, one of my teen girls “just happened” to ask me if I needed any help the afternoon before the shower. Um…lemme think about that. YES! Woohoo! It’s a blessing she came because there’s seriously no way I could have finished without her! We used some icing tips and did our best to make them look nice. Needless to say, we had some weird-o looking ones in the batch. Never try to pipe extremely cold frosting that’s been sitting in the fridge for 2 days. Let it sit out and get a little closer to room temperature first. You’ll thank me! (or maybe you won’t. but you should. 😉 I won’t bore you with any more details.
And I certainly won’t offer any advice other than to keep a sense of humor throughout the piping. 🙂
After we iced the cupcakes, I stuck an “A” and a heart on the top of each one. It’s important to put them in before the icing has “set.” Easy enough.


I’m kicking myself for not taking pics of the shower or of the cupcakes in the silver cupcake stands. Since I don’t have one, you’ll have to imagine it. Ready?
stunning pic of
cupcakes
in gorgeous silver
stands
There. You’re impressed, right? 😉 Sorry. I thought about bringing my camera, but I was seriously not about to try to take pics with everything else we were setting up. Oh well… you have a good imagination, so I’m sure you saw it, right? 🙂
That’s it! Fairly simple. The most time consuming part was icing the cupcakes. I’m sure it would get easier with practice. Not that I’m planning another practice session soon… 😉
Happy cupcake decorating! Let me know if you try it out! I would definitely love to see your pics!!!
~~~~~~~~~~~P.S.~~~~~~~~~~~
So, I totally messed up on the amount of icing I should make.
I read some estimate on yahoo answers (by the way, NOT a good source of any reliable info)
that gave me some ridiculously large amount of icing that I would need for my cupcakes.
I didn’t know it was a ridiculously large amount, so I decided to make a few more cups just so I wouldn’t run out.
I didn’t run out.
In case you were wondering.
On the contrary, I hardly made a dent in my purple icing.
(There was only a little peanut butter icing left.)
Here’s my leftover bowl of icing:

I think there’s – ohhhhh, somewhere around 8 cups of icing in that bowl.
Thankfully, a friend is taking cake decorating classes and she was able to take the icing off my hands.
And put it to good use. I think. Anyway, she took the icing off my hands and gave me back a clean bowl.
What’s better than that??? 😉
Comments
7 responses to “Cupcake Decor”
Woohoo, I got a shout out in your blog. I feel like a celebrity now. 🙂 You did an awesome job on the cupcakes and I think Angie took pictures of them in the stands if you want one. I was surprised that it is recommended not to use chocolate chips for melting because that’s all I’ve ever used when making chocolate covered strawberries, and I don’t even add shortening. I prefer milk chocolate to semi-sweet which is why I use the chips. 🙂
haha:) yeah, the chocolate chips worked great!! so glad too! 🙂
Simply beautiful! Love them!
They turned out sooo cute!! I always use chocolate chips too 🙂
Aha! Rebellious chocolate chip users unite!! 😉
Thanks, dear Becky! I love the pics of your farm cupcakes you made for the birthday party! sooo cute:)
[…] make sure I had enough. (Basically, I followed the exact same procedure I used when making these chocolate hearts for a friend’s baby […]